How to Read Harbor Tides: A Beginner's Guide for Coastal Walkers
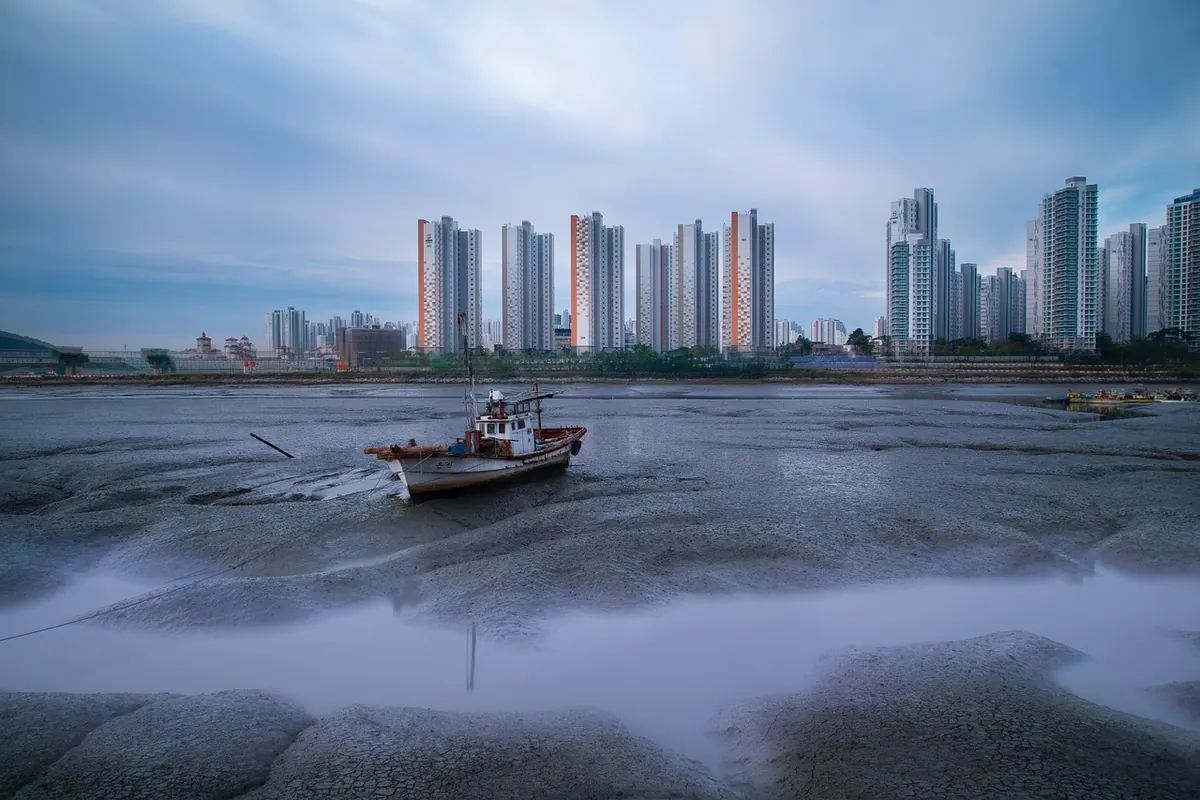
Low water in a small harbor is a kind of invitation. The slipway keeps going after the water has left it, the flats show their ribs of weed and broken shell, and the wall that normally stops at the waterline turns out to have another two meters of stone below it. It is tempting to walk out and look. The trouble is that a harbor keeps a schedule, and it keeps it whether or not anyone has checked.
Reading that schedule takes an evening of practice. You need a tide table for the right place, an understanding of what the heights actually measure, and a handful of things to look for on the ground once you get there. None of it requires a boating qualification. It does require you to be a little suspicious of your own optimism.
What a Tide Table Is Really Telling You
A tide table is a list of times and heights. Most days it gives two high waters and two low waters, each with a time and a height in meters or feet. That is the whole skeleton of it. Everything else is interpretation.
The times are local, and the local part matters
Tables are published for specific reference ports. If you are walking five kilometers up the coast, or deep inside an estuary, the water can arrive noticeably earlier or later than the printed time. Many tables list secondary ports with a time difference and a height difference to apply to the main port. Use those if they exist. If they don’t, add your own caution: treat the printed time as the middle of a window rather than an exact appointment.
The heights are not depths
Those numbers are measured from chart datum, a low-water reference level. A low tide of 0.4 meters does not mean forty centimeters of water in the harbor. It means the surface is forty centimeters above the reference plane—there may be a meter of mud, a drained channel, or a completely dry slipway underneath. The height tells you how the water level compares with other tides, not how deep anything is. This is the single most common misreading among people new to the coast.
The Shape Between the Numbers
Tide tables give you the peaks and the troughs. The interesting part is the curve in between, and it is not a straight line. Water does not rise at a steady rate from low to high; it creeps at first, accelerates through the middle, then eases off as it approaches high water.
A rough rule of thumb used by sailors splits the total rise into twelve parts. In the first hour after low water, about one twelfth of the rise arrives. In the second hour, two twelfths. The third and fourth hours take three twelfths each, the fifth takes two, and the sixth takes one. On a big tide with a four-meter range, that middle hour puts more than a meter of water across the flats while you are busy looking at a rusty mooring ring.
Two practical consequences follow. First, the fastest-moving water is in the middle of the tide, not at the start. Second, near high and low water there is a period of slack, when the level barely changes for twenty or thirty minutes. That slack is not a safety margin. It is the pause before the water reverses and does the whole thing again in the other direction.
Springs, Neaps, and What the Weather Adds
Tide ranges grow and shrink over a lunar month. Around the new and full moon, the sun and moon pull roughly in line and the range increases—these are spring tides, and their lows are genuinely lower, exposing ground that stays covered the rest of the month. Around the quarter moons, the range shrinks and you get neap tides, which are gentler in both directions.
The table describes an astronomical tide with no weather in it. Wind and pressure then modify it. A strong onshore wind can push water into a harbor and hold it there, raising the level and delaying the fall. Low atmospheric pressure lets the sea sit higher than predicted. Heavy rain inland can send a surge down an estuary that arrives at a completely different hour from the tide. In a narrow harbor entrance, all of this is amplified.
Treat the printed height as a forecast, not a contract. On a windy day, plan for more water than the table promised.
Finding Your Walking Window
The safe window around a harbor is usually the two to three hours centered on low water, adjusted for how much exposed ground you intend to cross and how quickly you can get back. Work it out before you leave the house:
- Get the table for the correct reference port and note the times and heights of both low waters that day.
- Work backwards from low water, not forwards from your arrival. Aim to be on the exposed ground after the tide has already fallen well.
- Set a turnaround time, not a turnaround place. If you plan to be back at the slipway ninety minutes before the next high, everything else follows.
- Identify your exits before you commit: a slipway, a set of steps, a ramp, a path up the seawall. Note at least one more than you think you need.
- Check the wind forecast. An onshore breeze of any strength should shorten your window.
Give yourself a margin you would be slightly embarrassed by. The coast rewards a little over-caution and punishes confident arithmetic.
Reading the Harbor Itself
The stonework and the beach keep records of where the water has been, and those records are often more reliable than your memory of the table.
- The weed line on the wall. A band of dark green or black growth marks the usual upper limit of the tide. If the water is already inside that band, the tide is well up.
- The wet-to-dry transition on the sand. Damp, darker ground above you and pale dry ground below means the water is still falling. Reverse that and it is coming back.
- Barnacles and limpets. These cluster in zones, and the top of the highest zone is close to the normal high-water mark.
- Algae on concrete. Green weed on a slipway or steps means the surface is slick. It is slippery even when it looks dry.
- Soft mud. Estuary mud can take a boot and hold it. Test with one foot before committing your weight.
- Moored boats and buoys. Watch which way they lie and how much chain is visible. A boat that has swung and slackened is telling you the current has changed.
Watch the entrance, not just your feet
Harbor mouths concentrate current. A channel that looks calm can be running hard just beyond the shelter of the pier, and the flow direction there often turns before the level does. If you are walking near an entrance, keep one eye on the water further out as well as the water at your boots.
If the Water Catches You Out
It happens to experienced people too, usually because a channel filled behind them. The first instinct is to retrace your steps quickly, which is often the worst option: the way you came may now be the deepest part of the flood.
Head for the nearest high ground instead—a raised quay, a rock outcrop, steps, anything above the weed line—and stay there. Do not wade a channel you cannot see the bottom of. Keep your phone dry and call for help if you are stranded or the water is still rising around you; harbor masters, coastguards and emergency services deal with this regularly and would far rather be called early than late. Cold water drains strength fast, so once you are out, get warm and dry before doing anything else.
A Short Field Routine
When you arrive at a harbor you do not know, spend five minutes doing this. Read the nearest tide table or the harbor notice board. Find the weed line on the wall and compare it with the present water level. Pick out two exits and note how far away they are. Then decide your turnaround time and say it out loud to whoever is with you.
Five minutes of reading buys you an afternoon of looking. The water will still come back—it always does—but you will know when, roughly how fast, and exactly where you are going when it does.
Photo: 강춘성 / Pixabay